
The Honeywell TH4110U2005 is a programmable thermostat designed for efficiency and ease of use․ It offers features like smart home compatibility and energy-saving capabilities, making it a popular choice for modern HVAC systems․ Customers praise its user-friendly interface and seamless installation process, ensuring optimal temperature control and value for money․
1․1 Overview of the Device and Its Features
The Honeywell TH4110U2005 is a programmable thermostat offering advanced features like smart home compatibility and energy efficiency․ It supports weekday/weekend scheduling and integrates seamlessly with systems like Alexa․ Designed for ease of use, it controls 24 Vac conventional, heat pump, or 750 mV heating systems, ensuring optimal performance and user-friendly operation․
1․2 Importance of Proper Installation
Proper installation of the Honeywell TH4110U2005 is crucial for optimal performance and safety․ Incorrect wiring or setup can lead to inefficiency, system malfunctions, or even safety hazards․ A well-executed installation ensures accurate temperature control, energy efficiency, and full utilization of smart features, making it essential to follow the manual or consult a professional if needed․
Key Features of the Honeywell TH4110U2005
The Honeywell TH4110U2005 offers programmable functionality, smart home compatibility, and energy-efficient operation․ Its user-friendly design ensures easy installation and seamless integration with HVAC systems, providing precise temperature control and enhanced comfort․
2․1 Programmable Functionality
The Honeywell TH4110U2005 features advanced programmable functionality, allowing users to set custom temperature schedules․ With options for weekday, weekend, and vacation modes, it ensures energy efficiency by adjusting settings when spaces are unoccupied․ The thermostat’s programming capabilities help maintain consistent comfort while reducing energy usage, making it an ideal choice for homeowners seeking convenience and savings․
2․2 Compatibility with Smart Home Systems
The Honeywell TH4110U2005 is compatible with popular smart home systems, including Amazon Alexa, enhancing its functionality․ Users can control temperatures remotely, schedule settings, and integrate with other smart devices for seamless home automation․ This compatibility ensures efficient energy management and improved convenience, making it a versatile option for modern smart homes․
2․3 Energy Efficiency Capabilities
The Honeywell TH4110U2005 promotes energy efficiency through programmable scheduling and smart features․ By optimizing temperature settings, users can reduce energy consumption and lower utility bills․ Its compatibility with smart home systems further enhances energy-saving capabilities, allowing for remote adjustments and tailored heating/cooling schedules to minimize waste and maximize comfort․
Hardware and Tools Required for Installation
The Honeywell TH4110U2005 thermostat requires basic tools like screwdrivers, wire strippers, and a drill․ Essential hardware includes the thermostat unit, mounting plate, and wiring connectors for installation․
3․1 Thermostat Unit and Accessories
The Honeywell TH4110U2005 thermostat includes the main unit, mounting plate, and wiring connectors․ Additional accessories like optional cover plates and screws are provided for a seamless installation․ These components ensure proper setup and functionality, guiding users through the installation process without requiring extra purchases․
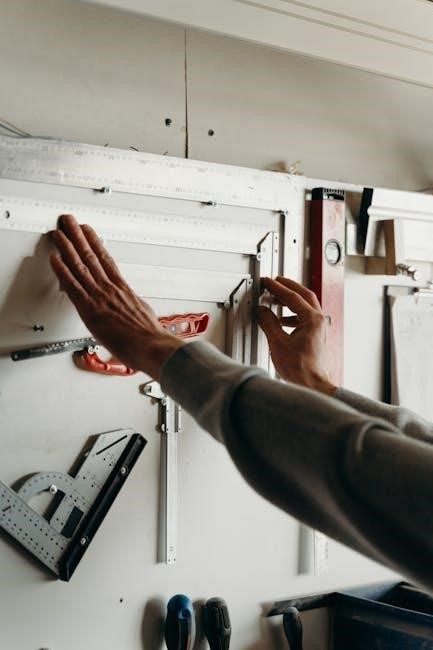
3․2 Essential Tools for the Process
For installing the Honeywell TH4110U2005, you’ll need a screwdriver, wire strippers, and a voltage tester․ Ensure you have a drill and wall anchors for mounting․ A ladder may be necessary for high installations․ Always turn off the power supply before starting work to ensure safety and avoid electrical hazards during the process․
Pre-Installation Preparation
Pre-installation preparation involves checking HVAC compatibility, understanding wiring configurations, and ensuring safety by disconnecting power․ These steps ensure a smooth and safe installation process․
4․1 Checking Compatibility with Your HVAC System
Before installation, verify the Honeywell TH4110U2005 is compatible with your HVAC system․ Ensure support for 24V AC or 750mV heating systems․ Check if your system is conventional or a heat pump, as wiring and functionality differ․ This step prevents installation issues and guarantees optimal performance․ Always refer to the manual for specific compatibility details․
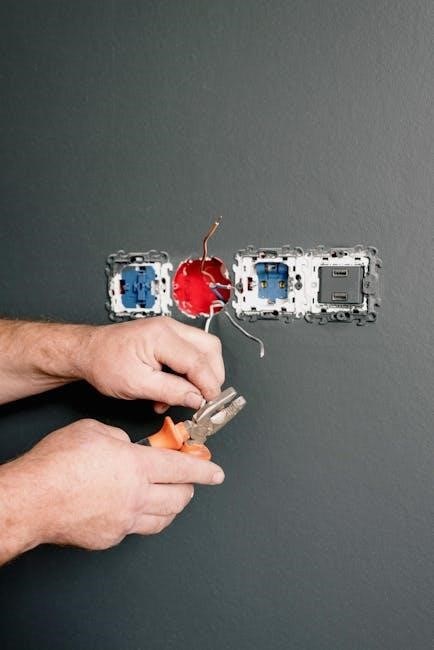
4․2 Understanding the Wiring System
Understanding the wiring system is crucial for proper installation․ Identify wires (R, W, Y, G, C, etc․) and their functions․ Match wires to the thermostat’s terminal labels․ Consult the manual for specific wiring configurations․ Incorrect wiring can lead to system malfunctions․ Ensure compatibility with your HVAC system’s wiring setup for reliable operation․
4․3 Safety Precautions
Always disconnect power before starting installation to avoid electrical shocks․ Handle wires carefully to prevent damage․ Ensure the thermostat is properly grounded․ Use appropriate tools and follow safety guidelines․ Keep the area clear of debris․ Refer to the manual for specific safety instructions․ Proper precautions ensure a safe and successful installation process․
Step-by-Step Installation Process
Begin by removing the old thermostat, then mount the new unit․ Connect the wires carefully, ensuring proper terminals․ Finally, test the system to confirm functionality and efficiency․
5․1 Removing the Old Thermostat
Switch off the power at the circuit breaker․ Remove screws or clips holding the old thermostat․ Gently pull it away from the wall․ Disconnect wires from terminals, noting their positions․ If the thermostat uses batteries, remove them before discarding the unit․ Ensure no wires are left connected to avoid damage during removal․ Proceed carefully to avoid damaging the wall or wiring․
5․2 Mounting the New Thermostat
Attach the base plate to the wall using screws provided․ Ensure it’s level for proper installation․ If necessary, use wall anchors for stability․ Gently snap the thermostat onto the base plate until it clicks securely․ For a cleaner look, install the optional cover plate․ Ensure all components are tightly fitted to avoid loose connections․ Proceed to wire connection step after mounting is complete․
5․3 Connecting the Wires
Match the wires from your HVAC system to the corresponding terminals on the thermostat․ Ensure compatibility with your system type (e․g․, conventional or heat pump)․ Gently insert wires into terminals, securing them firmly․ Double-check connections to avoid errors․ If unsure, consult the manual or a professional․ Turn power back on and test functionality to confirm proper wiring and system operation․ Proceed with programming after successful connection․
Wiring Configurations
The Honeywell TH4110U2005 supports various wiring setups, including 24V systems and 750mV heating․ Use the included adapter for heat pump compatibility․ Ensure proper terminal connections for optimal performance․
6․1 Conventional HVAC Systems
For conventional HVAC systems, the Honeywell TH4110U2005 uses standard wiring configurations․ Connect the R (24V), W (heating), Y (cooling), G (fan), C (common), and optional terminals․ Ensure compatibility with 24V or 750mV systems․ Follow the installation manual for precise connections, securing wires tightly to avoid issues․ Double-check labels and compatibility before powering up for a smooth setup and reliable operation․
6․2 Heat Pump Systems
The Honeywell TH4110U2005 is compatible with heat pump systems, requiring specific wiring configurations․ Connect the R, W, Y, G, C, and B (reversing valve) terminals as per the manual․ Ensure proper polarity for heat pump operation․ Double-check the wiring diagram for your system to avoid errors․ Testing the thermostat after installation is crucial to confirm correct operation in both heating and cooling modes․

Programming the Thermostat
Set daily schedules and adjust temperature setpoints to optimize comfort and energy savings․ The intuitive interface allows easy customization of heating and cooling preferences for efficiency․
7․1 Setting Up Daily Schedules
Open the menu, select scheduling, and choose between 5-1-1 or 5-2 programming; Set start/end times for heating/cooling periods․ Plan your schedule in advance for efficiency, ensuring comfort and energy savings․ Test the settings to confirm they work as expected․ Refer to the manual or online guides for troubleshooting if needed․
7․2 Adjusting Temperature Setpoints
Navigate to the temperature settings menu, use the arrows to increase or decrease the setpoint․ Ensure the desired temperature aligns with your comfort level and energy-saving goals․ The thermostat allows you to adjust settings manually or rely on its programmable features to automate temperature changes․ Check your schedule to confirm settings match your daily routine for optimal efficiency․

Post-Installation Checks
Verify the thermostat’s display is functional and responds to temperature adjustments․ Ensure all HVAC systems operate correctly and cycle as programmed․ Check for proper connectivity and functionality․
8․1 Testing the Thermostat’s Operation
After installation, test the thermostat by adjusting the temperature settings and observing the HVAC system’s response․ Ensure the display accurately reflects changes and the system cycles on/off correctly․ Check cooling, heating, and fan modes to verify smooth operation․ If issues arise, consult the manual or troubleshoot common problems like power supply or wiring․
8․2 Ensuring Proper Functionality
Verify that the thermostat operates consistently across all modes, including heating, cooling, and fan․ Check that temperature setpoints are reached accurately and that scheduling functions work as programmed․ Ensure there are no error messages and that the display remains responsive․ If functionality issues persist, refer to the troubleshooting guide or contact customer support for assistance․
Common Issues and Troubleshooting
Common issues include the display not turning on, unresponsiveness to temperature changes, or incorrect heating/cooling cycles․ Check power supply, wiring connections, and ensure proper installation․ Refer to the manual for troubleshooting steps or contact customer support for further assistance if problems persist․
9․1 Display Not Turning On
If the display is not turning on, first check the power supply to ensure the thermostat is properly connected․ Verify that all wires are securely connected, especially the C-wire if required․ Ensure the thermostat is mounted correctly and that the power switch is in the “on” position․ If issues persist, consult the installation manual or contact Honeywell customer support for assistance․
9․2 Thermostat Not Responding to Temperature Changes
If the thermostat isn’t responding to temperature changes, ensure proper wiring and verify sensor functionality․ Check if programming settings align with desired temperatures and schedules․ Reset the thermostat by turning it off and on, or perform a factory reset․ If issues persist, refer to the manual or contact Honeywell support for further troubleshooting assistance․
Maintenance and Upkeep Tips
Regularly clean the thermostat’s screen and sensors to ensure accuracy․ Check for software updates and install them promptly․ Inspect wiring connections to prevent issues and maintain optimal performance․
10․1 Cleaning the Thermostat
Regularly clean the thermostat’s screen and sensors using a soft, dry cloth to ensure accuracy․ Avoid harsh chemicals or liquids, as they may damage the device․ Gently wipe away dust or debris that could interfere with temperature readings․ For stubborn marks, a slightly damp cloth with mild soap can be used, but ensure it dries completely to maintain proper functionality․
10․2 Updating Software (If Applicable)
Check if your Honeywell TH4110U2005 thermostat requires software updates for optimal performance․ Refer to the official manual or manufacturer’s website for detailed instructions․ Ensure to follow the update process carefully to avoid any malfunctions․ If issues arise, contact Honeywell’s customer support for assistance; Regular updates can enhance functionality and ensure compatibility with smart home systems․
Energy-Saving Tips Using the Thermostat
Optimize energy usage by adjusting temperature setpoints and utilizing programmable scheduling․ Smart home integrations further enhance efficiency, ensuring comfort while reducing energy consumption․
11․1 Optimizing Temperature Settings
Set lower temperatures in winter and higher in summer to minimize energy use․ Use the programmable feature to adjust settings based on daily schedules, reducing heating or cooling when not needed․ Smart features allow remote adjustments, ensuring optimal temperatures without waste․ Regularly review and update settings to adapt to changing seasons and preferences, maximizing efficiency and comfort․
11․2 Using Smart Features for Efficiency
Leverage smart features like remote access and voice control through compatible systems․ Enable geofencing to adjust temperatures based on location․ Use energy reports to track usage and optimize settings․ Smart recovery learns your schedule to preemptively adjust temperatures, ensuring comfort while saving energy․ These features enhance efficiency without sacrificing convenience, making it easier to maintain an energy-efficient home․ Regular updates improve functionality and performance․
The Honeywell TH4110U2005 thermostat offers a balance of simplicity and advanced features, making it an excellent choice for efficient temperature control․ Proper installation and usage ensure optimal performance and energy savings, providing long-term comfort and convenience for homeowners․
12․1 Summary of Key Installation Steps
Key installation steps include turning off power, removing the old thermostat, mounting the new unit, connecting wires, and testing functionality․ Ensure compatibility with your HVAC system and refer to the manual for specific wiring configurations․ Proper setup ensures efficient operation and energy savings, while adherence to safety precautions guarantees a secure installation process for optimal performance․
12․2 Final Thoughts on Proper Usage
Proper usage of the Honeywell TH4110U2005 ensures optimal performance and energy efficiency․ Regularly review and adjust temperature settings, and utilize programmable features to align with your schedule․ Maintain the thermostat by cleaning it periodically and updating software if necessary․ Troubleshoot common issues promptly, and refer to the manual for guidance․ Proper care extends its lifespan and enhances your comfort․
Additional Resources
For further assistance, visit the official Honeywell website for the TH4110U2005 manual, troubleshooting guides, and customer support contact information․ Additional installation videos and FAQs are also available online․
13․1 Accessing the Official Manual
The official Honeywell TH4110U2005 manual is available on the Honeywell Home website․ It provides detailed installation instructions, wiring diagrams, and troubleshooting tips․ Users can download the PDF manual directly from the support section, ensuring they have accurate information for setup and maintenance․ The manual is designed for both DIY installers and professionals․
13․2 Contacting Customer Support
For assistance with the Honeywell TH4110U2005, customers can contact Honeywell’s customer support team․ Support options include phone, email, and live chat․ The official Honeywell website provides contact details and a comprehensive support portal with FAQs, troubleshooting guides, and repair resources․ Representatives are available to address installation, programming, and maintenance inquiries, ensuring timely resolution for any issues․