
Cross stitch is a timeless‚ creative hobby perfect for beginners. With minimal supplies and straightforward techniques‚ it offers a relaxing way to craft beautiful designs. Start your stitching journey today and explore endless possibilities for artistic expression!
What is Cross Stitch?
Cross stitch is a traditional embroidery technique using X-shaped stitches on fabric. It involves creating patterns on a grid system‚ making it easy to follow and ideal for beginners. Each design is formed by stitching X’s that align with a chart or pattern. This craft is versatile‚ allowing you to create decorative pieces for home‚ clothing‚ or gifts. Its simplicity and creative possibilities make it a popular hobby worldwide.
Why Cross Stitch is Perfect for Beginners
Cross stitch is an excellent craft for beginners due to its simplicity and forgiving nature. It requires minimal supplies‚ and the basic stitches are easy to learn. The grid-based patterns are straightforward to follow‚ making it ideal for those new to embroidery. Plus‚ the repetitive stitching motion is calming and meditative‚ allowing you to create beautiful designs while relaxing. It’s a great way to build creativity and confidence in crafting.

Materials Needed for Cross Stitch
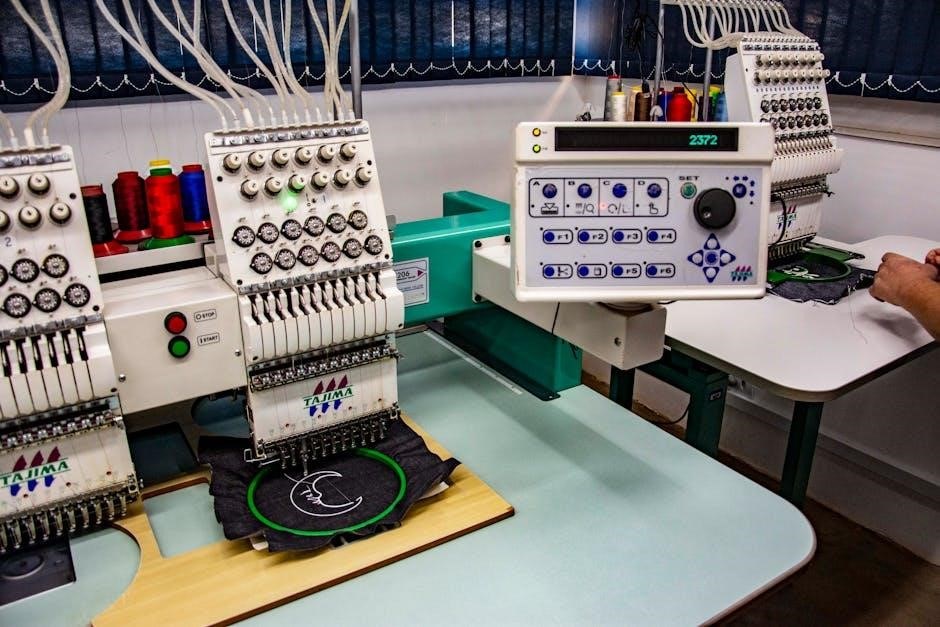
Essential supplies include Aida or evenweave fabric‚ embroidery floss‚ a tapestry needle‚ and scissors. Optional accessories like hoops or frames can aid stitching comfort and precision.
Essential Supplies: Fabric‚ Thread‚ and Needles
The foundation of cross stitch lies in three key materials: fabric‚ thread‚ and needles. Aida cloth or evenweave fabric is ideal for beginners‚ offering easy stitching and visibility. Embroidery floss‚ typically from brands like DMC‚ comes in vibrant colors and is used in strands. A tapestry or blunt-tipped needle is perfect for stitching‚ while sharp scissors keep your threads neatly trimmed. These basics ensure a smooth start to your stitching journey.
Choosing the Right Fabric for Beginners
For beginners‚ Aida cloth is the most recommended fabric due to its clear‚ evenly spaced holes. Opt for Aida 14 Count‚ a popular choice for its manageable stitch density. Evenweave linen is another option but can be more challenging for new stitchers. Always choose a fabric large enough to accommodate your design and ensure it’s evenly stretched for consistent stitching. This sets a strong foundation for your cross stitch projects.
Understanding Basic Cross Stitch Techniques
Mastering basic cross stitch techniques is essential for beginners. The full cross stitch‚ half stitch‚ and backstitch are fundamental. These stitches form the foundation of any design‚ ensuring clarity and precision. Learning them allows you to interpret patterns confidently and create beautiful‚ intricate designs.
Learning the Full Cross Stitch
The full cross stitch is the cornerstone of cross stitching. Begin by bringing your needle up at point 1‚ insert it at point 2 to create the first diagonal‚ then bring it up at point 3 and insert at point 4 to complete the cross. This stitch is essential for beginners‚ forming the basis of most designs. Practice evenly spacing your stitches for a polished look.
Half Stitch and Quarter Stitch Basics
The half stitch is a single diagonal stitch‚ forming half of a full cross stitch. It’s useful for details and shading. The quarter stitch is even smaller‚ placed at one corner of a square‚ often used for intricate designs. Both stitches are essential for adding depth and complexity to your patterns. Starting with these will help you master more advanced techniques later on.
Backstitch for Outlining Designs

Backstitch is a straight line stitch used to outline designs‚ creating bold‚ defined edges. It’s formed by inserting the needle in the opposite direction of the stitching line. This stitch adds clarity to patterns and is especially useful for text or intricate details. Mastering the backstitch enhances your project’s professionalism and makes your designs stand out with sharp‚ clean lines.
How to Read a Cross Stitch Pattern
A cross stitch pattern uses a grid of squares‚ with symbols representing colors and stitches. Each square corresponds to one stitch‚ guiding you to replicate the design accurately.
Understanding the Pattern Chart
A cross stitch pattern chart is a grid of squares‚ where each square represents a single stitch. Symbols or colors within the squares indicate the specific thread color or stitch type. The chart maps directly to your fabric‚ guiding stitch placement. Understanding the chart is essential for accurate stitching‚ as it visually represents the design. Always follow the symbols carefully to ensure your stitches align with the pattern’s intended design.
Color Codes and Symbols Explained
Color codes and symbols are essential for interpreting cross stitch patterns. Each symbol represents a specific thread color or stitch type. For example‚ a black square might indicate black thread‚ while a half-filled square could signify a half-stitch. Special symbols‚ like backstitch lines‚ guide outlining. Understanding these codes ensures accurate stitching. Refer to the chart’s key to match symbols with their corresponding colors and techniques‚ making the stitching process clear and manageable for beginners.

Choosing the Right Pattern for Beginners
For beginners‚ choose patterns with simple designs and basic stitches. Look for small‚ manageable projects with clear instructions and color codes to ensure an enjoyable stitching experience.
Simple Patterns for Skill Development
Starting with simple patterns helps build foundational skills. Look for designs featuring basic cross stitches and minimal color changes. These patterns allow you to practice stitching techniques without overwhelming complexity. Many free PDF resources offer beginner-friendly motifs like small animals‚ flowers‚ or holiday themes. These projects are ideal for mastering fabric tension‚ thread management‚ and following charts. They also provide a sense of accomplishment as you complete each piece‚ boosting confidence and motivation to take on more intricate designs.
Free PDF Patterns for Beginners
Discover a wide selection of free cross stitch PDF patterns designed specifically for beginners. These downloadable resources offer simple yet charming designs‚ perfect for practicing essential stitches. Themes range from holiday motifs to adorable animals‚ ensuring there’s something for every interest. Instantly access and print these patterns to start your stitching journey without cost or commitment‚ making it easy to learn and enjoy cross stitch.

Preparing Your Fabric and Thread
Cut fabric to size‚ stretch‚ and secure with a hoop or frame for stability. Thread your needle with embroidery floss‚ managing thread length to prevent tangles.
Cutting and Stretching Fabric
Cut your fabric to the desired size‚ leaving extra around the edges for framing. Use scissors or a rotary cutter for even cuts. Stretch the fabric tightly over a hoop or frame to keep it taut‚ ensuring even stitching. For beginners‚ Aida fabric is ideal due to its clear weave. Avoid over-stretching‚ as it can distort the fabric. Secure the fabric edges with clips or tape to maintain stability while stitching.
Threading Your Needle and Managing Thread
Thread your needle with 2-3 strands of embroidery floss for cross stitch. Cut the thread at an angle for easier threading. Leave a small tail and secure it with a few stitches on the fabric’s edge. To manage thread effectively‚ wind it around a spool or card to prevent tangling. This keeps your workspace organized and ensures smooth stitching. Always handle the thread gently to maintain tension and avoid knots.

Starting Your First Stitch
Begin by creating a half stitch on the front of your work and hold the thread tail behind your work. Cross the stitch diagonally to create your first cross stitch‚ securing the thread tail as you go. This simple step marks the start of your stitching journey‚ offering an easy and satisfying way to bring your design to life.
Creating Your First Cross Stitch
Begin by threading your needle with embroidery floss and tie a small knot at the end. Bring the needle up through the fabric at point 1‚ then insert it at point 2 diagonally to create a half stitch. Next‚ bring the needle back up at point 3 and insert at point 4 to complete the full cross stitch. Gently pull the thread to secure the stitches‚ ensuring they lie flat and even on the fabric.
Securing the Thread Tail
To prevent the thread from unraveling‚ secure the tail by weaving it under several stitches on the fabric’s backside. Use a tapestry needle to gently loop the thread through the stitches without pulling too tightly. Trim the excess thread close to the fabric to keep your work neat and tidy. This simple step ensures your stitches remain secure and your finished piece looks professional and polished. Always handle the thread carefully to avoid tangling or breaking.

Tips for Successful Cross Stitching
Maintain even tension to prevent fabric distortion. Use the right needle size and keep fabric taut but not overly tight. Work in a well-lit area and take breaks to avoid eye strain and maintain focus. These simple practices ensure clean‚ precise stitches and a professional finish to your cross-stitch projects.
Maintaining Tension and Even Stitches
Maintaining even tension is key to achieving professional-looking cross-stitch results. Keep fabric taut but not overly tight to prevent puckering. Use a hoop or frame for stability. Work consistently‚ ensuring each stitch lies flat. Avoid pulling thread too tightly‚ as this can distort the fabric; Even tension ensures smooth‚ uniform stitches. Regularly check your work under good lighting to maintain consistency and avoid unevenness. Patience and steady hands lead to flawless stitching.
Common Mistakes to Avoid
Beginners often make mistakes like uneven tension‚ miscounting stitches‚ or using the wrong needle size. Ensure fabric stays taut but not too tight to avoid puckering; Always secure thread tails properly to prevent loose ends. Pay attention to stitch direction for consistency. Avoid using too much thread‚ as it can tangle or knot. Regularly review your work to catch errors early‚ saving time and frustration in the long run.
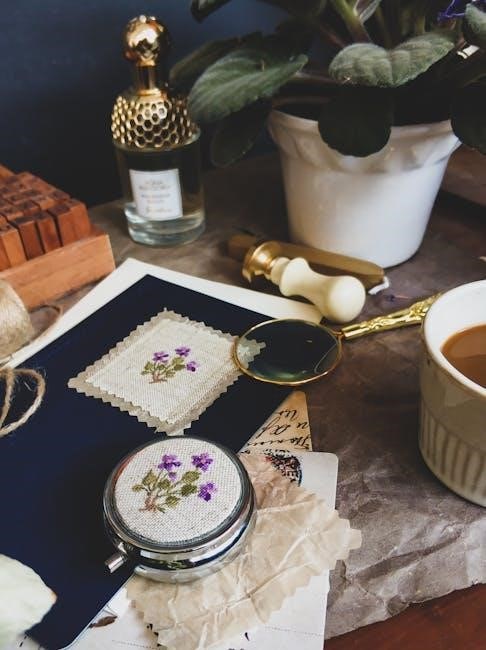
Finishing Touches
Trim excess thread neatly and iron your finished work from the back to flatten stitches. For a professional look‚ consider framing or mounting your piece to preserve it. Properly washing and ironing ensures durability and maintains vibrant colors‚ completing your stitching project beautifully.
Trimming Excess Thread
Once your project is complete‚ carefully trim excess thread close to the fabric using small‚ sharp scissors. Work on a flat surface to avoid cutting stitches. This step ensures a clean finish and prevents loose ends from unraveling. For intricate designs‚ use tweezers to remove tiny thread remnants. Proper trimming enhances the overall appearance‚ making your stitched work look polished and professional. Maintain patience for a flawless result.
Washing and Ironing Your Finished Work
Gently hand wash your finished cross stitch in cold water with mild detergent to protect the fabric and stitching. Lay flat to air dry‚ avoiding direct sunlight. For ironing‚ place the stitched side face down on a towel‚ cover with a cloth‚ and iron on low-medium heat. This preserves the design and keeps the fabric smooth‚ ensuring your artwork remains vibrant and professionally finished for years to come.
Mastering the basics opens the door to endless creative possibilities. Explore advanced stitches‚ detailed patterns‚ and free PDF resources from sites like LoveCrafts to keep stitching and creating beautifully!
Troubleshooting Common Issues
Troubleshooting Common Issues
Common issues for beginners include uneven stitches‚ thread tangling‚ and fabric misalignment. To fix uneven tension‚ use a hoop or stretcher bars. For thread management‚ cut lengths no longer than 18 inches and use a needle threader. If stitches are misaligned‚ count carefully and refer back to your pattern. Proper fabric preparation and consistent stitching direction can prevent most errors. Practice patience and adjust as needed for flawless results.
Exploring Advanced Techniques
Once comfortable with basics‚ explore advanced techniques like three-quarter and quarter stitches for intricate details. Metallic‚ neon‚ or glow-in-the-dark threads add unique effects. Backstitching enhances design outlines‚ while specialty stitches create texture. Experiment with layered stitching for depth and dimension. Download advanced PDF patterns to practice these skills and elevate your cross-stitch projects to professional-quality designs with creative and visually stunning results.